So you're downloaded and installed GPX2IMG but don't know what to do now? You've come to the right place! Follow along for a quick step-by-step tutorial on how to convert your GPX files to IMG files you can load onto your GPS unit.
What You Need
| • | GPX2IMG |
| • | A GPX file from your GPS unit (or Mapsource, or online) |
| • | Garmin Mapsource (or Basecamp) or a GPS unit you can load your own IMG files onto |
Step 1
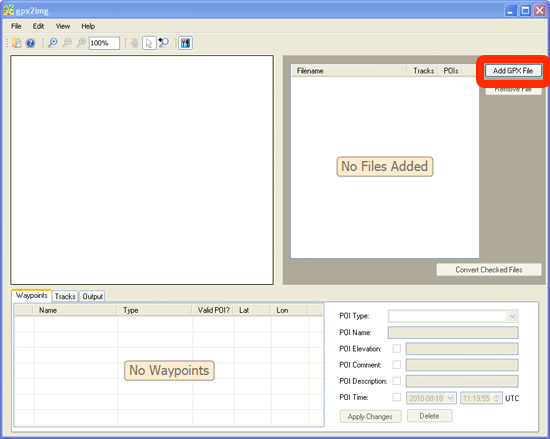
Open GPX2IMG.
Step 2
Open a GPX file by clicking the "Add GPX File button":
Step 3
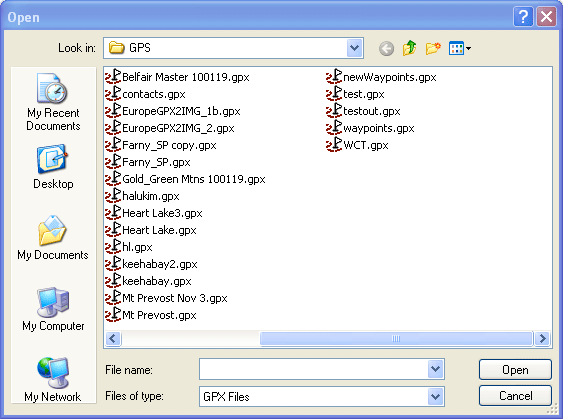
Using the Open File dialog, select your GPX file (or files) where they are stored on your computer and click the 'Open' button. (Hold the Ctrl button on your keyboard when clicking files to open multiple files at one time.)
Step 4
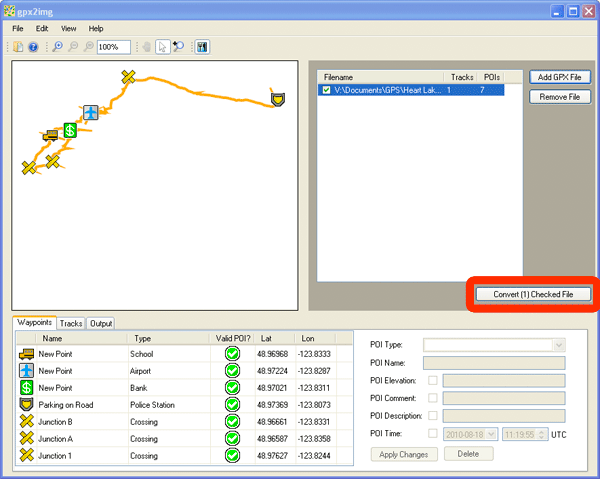
After the GPX file has loaded, you will be given a preview of the map in the map preview area, the waypoints will be listed in the waypoint tab and the tracks will be listed in the track tab.
For basic conversion, you don't need to do anything else, just click the "Convert Checked Files" button under the file listings.
After conversion if finished, you'll see a dialog box similar to this:

Conversion has been completed successfully and you can load your maps onto your GPS unit using Mapsource!
Check out the Editing POIs, Editing Tracks, Options and Advanced Features sections of the help guide to explore some of the advanced features of GPX2IMG.