Once you've converted your GPX files into IMG files using GPX2IMG, how do you get them onto your GPS unit using Mapsource?
All maps created using GPX2IMG are transparent maps. This means that the only information they contain is the tracks and waypoints from your GPX file. They do not contain a background image. This means that you can load your created IMG files along with a base map (topo, city, etc) and they will both appear on your GPS unit.
To load your created maps along with a base map, follow the instructions below:
Step 1
Launch Mapsource
Step 2
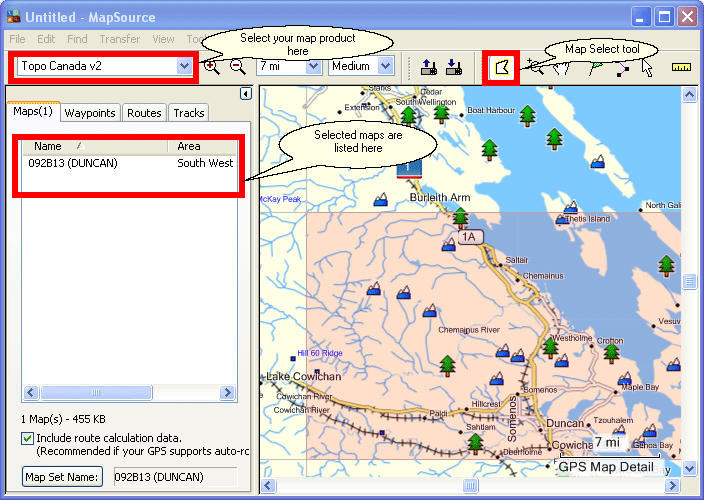
Select the base maps you wish to load with the maps you created.
In the example below, I've selected the Topo Canada 2 map and used the Map Select tool to select the map region which is in the same area as the map I created. This map is then listed in the Maps tab on the left of Mapsource
Step 3
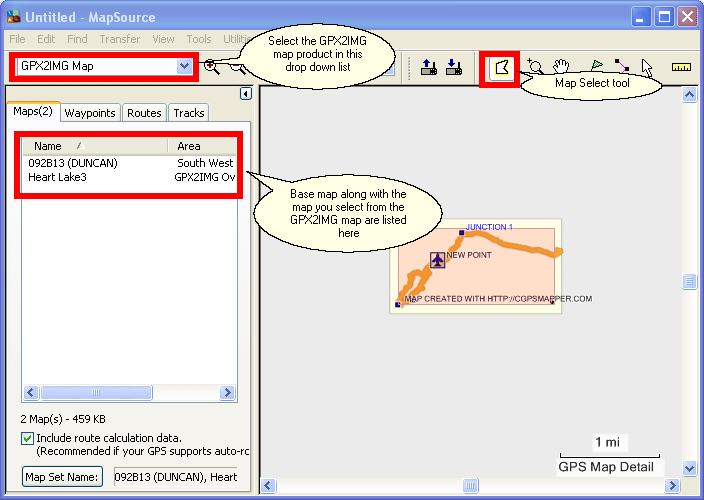
Switch to the map product created by GPX2IMG ("GPX2IMG Maps" by default) and select the created maps using the Map Select tool. You will see the maps you select are now listed in the map listing area in Mapsource.
Step 4
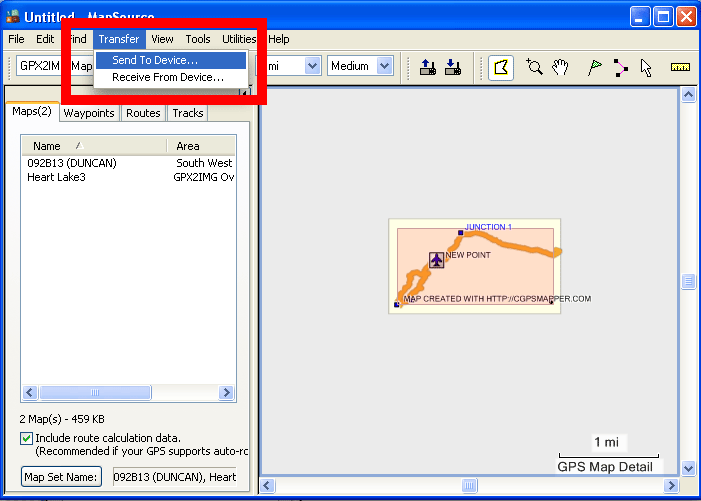
Upload the map sets to your GPS unit.
Step 5
You should now be able to view your created maps on your GPS unit. If the map does not appear, you may need to change the settings of your GPS unit to enable display of the maps. See http://www.gpsfiledepot.com/tutorials/how-to-change-which-map-is-displayed-on-a-garmin-gps/ for more details.