
Converting your GPX files to Garmin IMG Files

So you're downloaded and installed GPX2IMG but don't know what to do now? You've come to the right place! Follow along for a quick step-by-step tutorial on how to convert your GPX files to IMG files you can load onto your GPS unit.
To start, please download the 2 following GPX files:
(You will probably need to right-click the link and choose "Save Target As" in IE, or "Save Link As" in Firefox.)
keehabay.gpx
and WCT.gpx
and save them in a convenient location with the specified filenames.
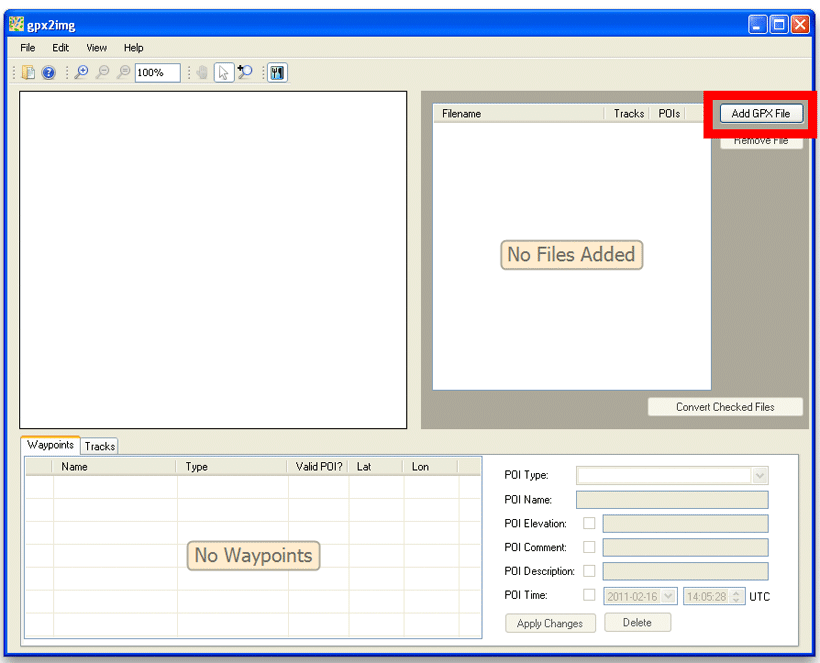
Launch GPX2IMG
Click the "Add GPX File" button
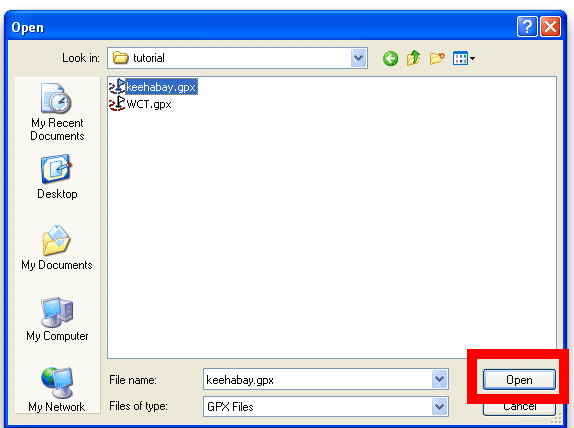
Navigate to where you saved your files and select the "keehabay.gpx" file and click "Open"
Do the same for the "WCT.gpx" file. (You could also hold the Ctrl button on the keyboard while selecting both files at once)
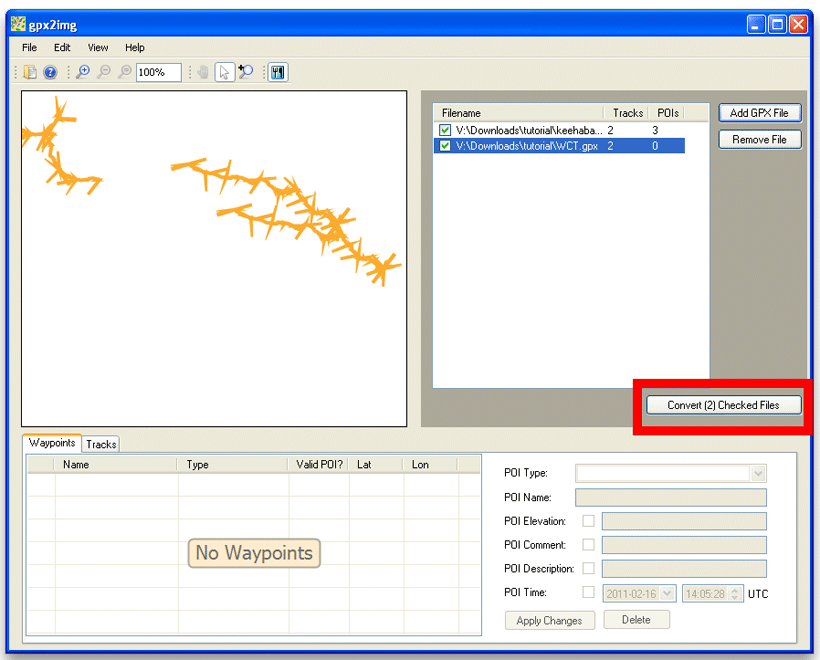
Click the "Convert (2) Checked Files" button
After a short wait (plus 15 seconds in the trial), you'll get the success window!

Open Mapsource
Using the Product drop down in Mapsource, select the "GPX2IMG Map". (Can also be selected from the View -> Switch to Product menu)
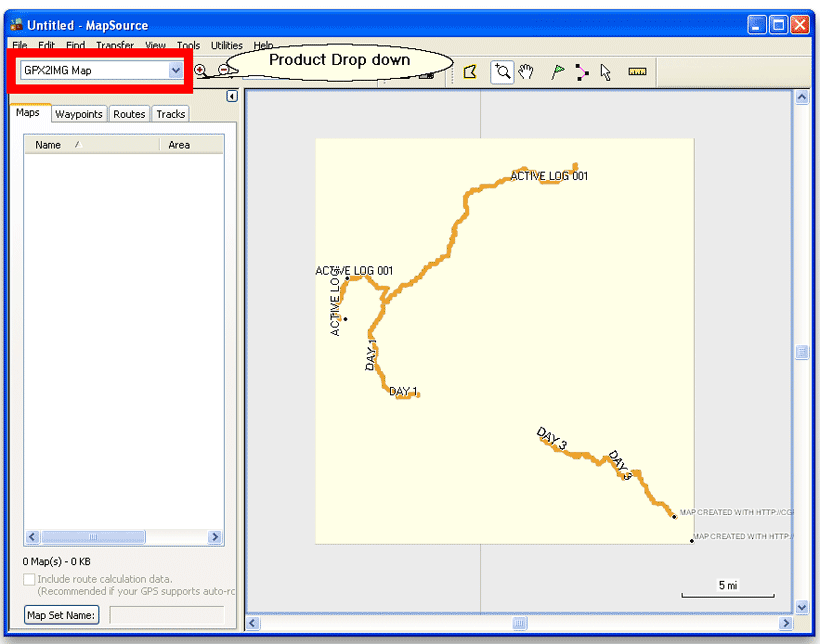
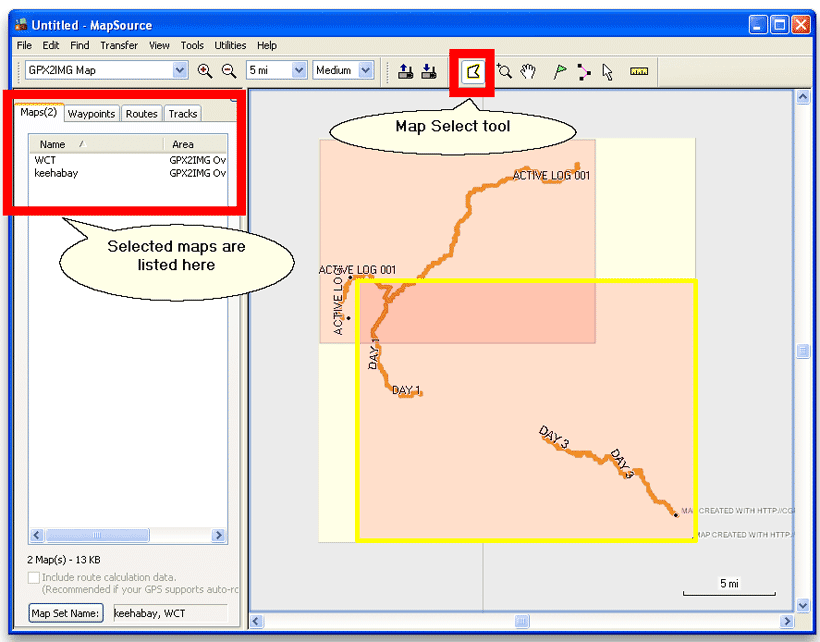
Using the Map Select tool, select the 2 map tiles. The maps are then listed in the Maps tab on the left of Mapsource
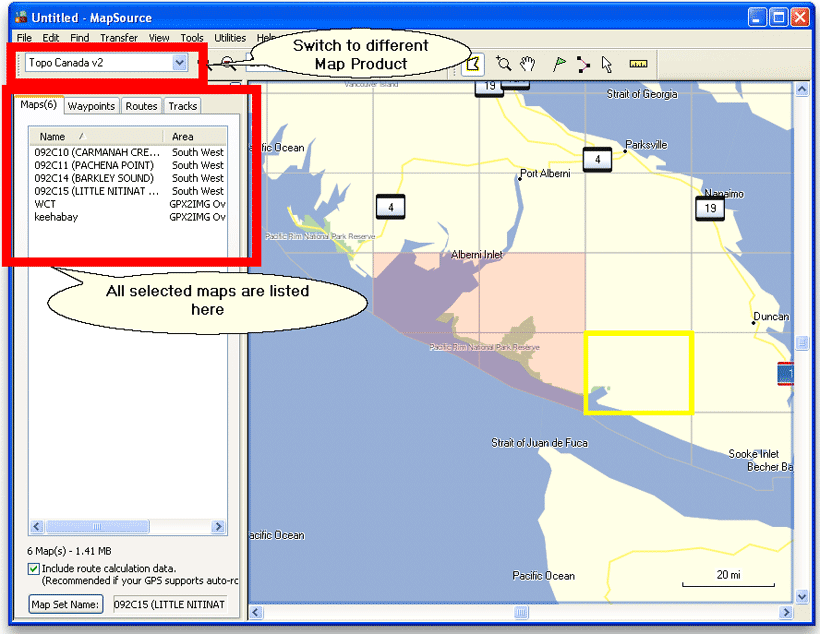
To load with another map (eg topo, city, etc), (without clicking elsewhere on the map) switch to your desired product using the drop down list and using the Map Select tool,
select the map tiles you wish to load along with your map.
In my example, I am loading the Topo Canada maps from the same area as the maps we just created.
From the Transfer menu, choose "Send to Device.." and load your maps to your GPS unit as you normally would.
You should now be able to view the newly created maps on your GPS unit along with any other maps you loaded with it.
If the map does not appear, you may need to change the settings of your GPS unit to enable display of the maps. See http://www.gpsfiledepot.com/tutorials/how-to-change-which-map-is-displayed-on-a-garmin-gps/ for more details.